10 Years in IT

A cool anniversary just passed yesterday.

10 years and 4 months ago I was managing a store in South St. Louis for the pink cellular carrier, and I saw my wages getting cut over and over due to bad tactics by the company. I mentioned this to a friend I was planting a church with, and he told me he worked in IT and extolled the wonders of working with computers. He encouraged me to get into the field of Information Technology. To sweeten the encouragement, he even offered to reimburse me for the costs of obtaining Security+, if I passed it on my first try.

Since I like challenges, and since it’s very less than ideal to see your income declining from barely making ends meet to not making them eat when you have a wife and baby at home, I bought a study guide and hit the books for a few weeks. Then I took the exam and passed it. My friend was good on his word and he reimbursed me.

Another friend informed me that his company was hiring for help desk technicians. He gave me the direct line of the recruiter. I called that guy every day for 3 weeks and left a voicemail repeating my desire for the job.

I got a call from the recruiter after a few weeks and he apologized for not calling sooner; he had been on vacation! Whoops! He liked my eagerness, and he scheduled me for an interview.

Thankfully I did well and got the job.

Since then I’ve done help desk, application support, and sysadmin stuff. It’s been a good ride so far!

I’m not a graybeard yet. Wait, I do have a little gray in my beard, I guess.

10 years later, though I don’t interact with end users very much anymore , and though I work a lot with vSphere, other hypervisors such as QEMU and Hyper-V, networking, storage, I still reach into the back pocket for that old troubleshooting tool every now and then:

“Have you tried turning it off and on again?”

Where in the World is vWebster?!

It has been a while since I’ve published a blog post here.

I’m still alive though. I am still doing technical things, and I still design, implement, and maintain technical solutions that use VMware products. However, my day to day is much more of a generalist in my role.

So, I’ve used the time (and employer benefits) to begin pursuing an MBA. I’m about 2/3 of the way through that now. I also snagged a CCNA and have been working towards getting a CCNP. I will probably wait to try the ENCOR again, and the ENARSI exams until I’m done with the degree.

In the meantime, I will be tinkering with my home lab, maybe posting some more blog posts, wrapping up grad school, and traveling for work.

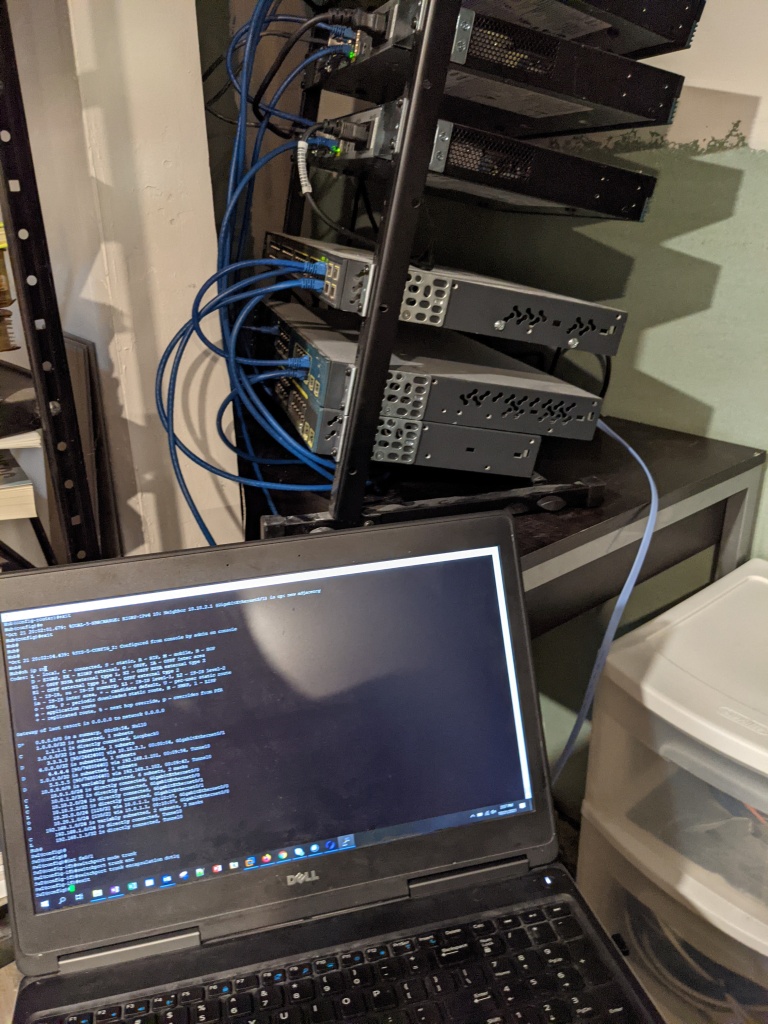
Seen below, my home lab (the networking part of it anyway) and the current topology. I’ve got some ESXi hosts also that aren’t pictured.

Deploy vCSA 6.5 with PowerShell!

I posted a while back on a scripted deployment of the vCenter Server Appliance 6.0. I found the scripted method where PowerShell is leveraged to execute a .json script to be superior to the GUI-based method of deploying the vCSA, especially if multiple vCSAs need to be deployed.

The method of deploying the vCSA 6.5 via PowerShell is a little different than the method of deploying the vCSA 6.0, in that the .json script is slightly different, and the PowerShell command is different as well. In my opinion, it’s been simplified a bit.

The  .json script is included in the ISO for the vCSA at E:\vcsa-cli-installer\templates. You can use the script from the relevant deployment type you’re going to do; you can browse to install, upgrade, or migrate templates. From there, you can also select between templates for the relevant vCenter topology you’re going to use. I’ve included the .json template for installing an embedded vCSA on ESXi below; you’d use this in a situation wherein you are either deploying a brand new vCSA in a greenfield deployment, or you are replacing an existing vCenter, but either can’t upgrade it, or don’t wish to.

Open the .json template in your preferred text editor. Start at “esxi” and add in your relevant configurations in the areas bracketed <> off.

Be sure that you’ve already completed the prerequisites of deploying the vCSA: The big one is having a DNS entry for the vCSA to resolve its IP into a FQDN and vice versa.

{
“__version”: “2.3.1”,
“__comments”: “Sample template to deploy a vCenter Server Appliance with an embedded Platform Services Controller on an ESXi host.”,
“new.vcsa”: {
“esxi”: {
“hostname”: “<FQDN or IP address of the ESXi host on which to deploy the new appliance>”,
“username”: “root”,
“password”: “<Password of the ESXi host root user. If left blank, or omitted, you will be prompted to enter it at the command console during template verification.>”,
“deployment.network”: “VM Network”,
“datastore”: “<A specific ESXi host datastore, or a specific datastore in a datastore cluster.>”
},
“appliance”: {
“thin.disk.mode”: true,
“deployment.option”: “small”,
“name”: “Embedded-vCenter-Server-Appliance”
},
“network”: {
“ip.family”: “ipv4”,
“mode”: “static”,
“ip”: “<Static IP address. Remove this if using dhcp.>”,
“dns.servers”: [
“<DNS Server IP Address. Remove this if using dhcp.>”
],
“prefix”: “<Network prefix length. Use only when the mode is ‘static’. Remove if the mode is ‘dhcp’. This is the number of bits set in the subnet mask; for instance, if the subnet mask is 255.255.255.0, there are 24 bits in the binary version of the subnet mask, so the prefix length is 24. If used, the values must be in the inclusive range of 0 to 32 for IPv4 and 0 to 128 for IPv6.>”,
“gateway”: “<Gateway IP address. Remove this if using dhcp.>”,
“system.name”: “<FQDN or IP address for the appliance. Remove this if using dhcp.>”
},
“os”: {
“password”: “<Appliance root password; refer to –template-help for password policy. If left blank, or omitted, you will be prompted to enter it at the command console during template verification.>”,
“ssh.enable”: false
},
“sso”: {
“password”: “<vCenter Single Sign-On administrator password; refer to –template-help for password policy. If left blank, or omitted, you will be prompted to enter it at the command console during template verification.>”,
“domain-name”: “vsphere.local”,
“site-name”: “<vCenter Single Sign-On site name>”
}
},
“ceip”: {
“description”: {
“__comments”: [
“++++VMware Customer Experience Improvement Program (CEIP)++++”,
“VMware’s Customer Experience Improvement Program (CEIP) “,
“provides VMware with information that enables VMware to “,
“improve its products and services, to fix problems, “,
“and to advise you on how best to deploy and use our “,
“products. As part of CEIP, VMware collects technical “,
“information about your organization’s use of VMware “,
“products and services on a regular basis in association “,
“with your organization’s VMware license key(s). This “,
“information does not personally identify any individual. “,
“”,
“Additional information regarding the data collected “,
“through CEIP and the purposes for which it is used by “,
“VMware is set forth in the Trust & Assurance Center at “,
http://www.vmware.com/trustvmware/ceip.html . If you “,
“prefer not to participate in VMware’s CEIP for this “,
“product, you should disable CEIP by setting “,
“‘ceip.enabled’: false. You may join or leave VMware’s “,
“CEIP for this product at any time. Please confirm your “,
“acknowledgement by passing in the parameter “,
“–acknowledge-ceip in the command line.”,
“++++++++++++++++++++++++++++++++++++++++++++++++++++++++++++++”
]
},
“settings”: {
“ceip.enabled”: true
}
}
}

Be sure to save the template to a location you can access, and save it as .json.

Then, with the ISO still mounted, launch PowerShell as admin, cd to <Install Drive>:\vcsa-cli-installer\<relevant OS> and run the following command:

.\vcsa-deploy.exe install –no-esx-ssl-verify –accept-eula –acknowledge-ceip “C:\Path\To\Your\vCSA.json”

PowerShell will deploy the vCSA and give you status updates as the rpm is deployed, as services are started, etc.

In all, like I said, this is a much easier way to deploy vCSA 6.5 than using the GUI. It’s also a good introduction to scripting.


Enjoy!

VCAP Deploy Study Aid

When I was preparing fro the VCAP6-Deploy exam, I came up with a list of tasks I needed to be able to do in a lab, and able to do proficiently, and then I labbed those tasks out until I was comfortable doing them.

I’ve provided the tasks I came up with matched up to the Blueprint Objectives below. Basically, if you can do these things with minimal reference to documentation, you can probably pass the VCAP Deploy. Hope this helps!

  1. Set up AutoDeploy from scratch. – Obj 1.1
  2. Set up Host Profiles for Stateless and Stateful Installs. – Obj 1.1
  3. Modify and use a ks.cfg. – Obj 1.1
  4. Edit System Swap / Scratch Config in GUI. – Obj 1.1
  5. Edit System Swap / Scratch Config in CLI. – Obj 1.1
  6. Add Central Syslog Server on Host. – Obj 1.1
  7. Manage/Edit Core Dump of ESXi Host. – Obj 1.1
  8. Deploy PSC. – Obj 1.2
  9. Repoint a vCSA to an external PSC. – Obj 1.2
  10. Configure users for SSO. – Obj 1.2
  11. List services registered with SSO. – Obj 1.2
  12. Deploy and Configure vCenter – Windows and vCSA. – Obj 1.2
  13. Configure Enhanced Linked Mode. – Obj 1.2
  14. Configure Global Permissions in vCenter. – Obj 1.2
  15. Configure Dump Collector in vCenter. – Obj 1.2
  16. Configure Syslog Collector / Service. – Obj 1.2
  17. Manage vCenter Server Advanced Configs. – Obj 1.2
  18. Deploy and Configure VUM. – Obj 1.3
    1. Configure UMDS.
    2. Configure Shared Respository.
    3. Configure Smart Rebooting.
    4. Create and Modify Baseline groups.
  19. Perform VUM orchestrated vSphere upgrades. – Obj 1.3
  20. Reconfigure VUM with VUM. – Obj 1.3
  21. Reconfigure VM Advanced Settings. – Obj 1.4
    1. Disk Controller.
    2. Configure .vmx for advanced configs.
    3. Upgrade Tools and Hardware.
  22. Deploy RDM. – Obj 2.1
  23. Mask LUNs with PSA-Related Commands. – Obj 2.1
  24. Resignature VMFS. – Obj 2.1
  25. Create / Configure multiple VMkernels for use with iSCSI port binding. – Obj 2.1
  26. Configure / Manage vSphere Flash Read Cache. – Obj 2.1
  27. Create / Configure Datastore Clusters. – Obj 2.1
  28. Upgrade VMware storage infrastructure. – Obj 2.1
  29. Deploy virtual volumes. – Obj 2.1
  30. Deploy and configure VMware Virtual SAN. – Obj 2.1
  31. Configure / View VMFS locking mechanisms. – Obj 2.1
    1. ATS-Only mechanism.
    2. ATS_SCSI mechanism.
  32. Configure Storage I/O Control to allow I/O prioritization. – Obj 2.1
  33. Configure Storage Multi-pathing according to a deployment plan. – Obj 2.1
  34. Identify and tag (mark) SSD and local devices. – Obj 2.2
  35. Administer hardware acceleration for VAAI. – Obj 2.2
  36. Configure, administer, and apply storage policies. – Obj 2.2
  37. Prepare storage for maintenance. – Obj 2.2
  38. Apply space utilization data to manage storage resources. – Obj 2.2
  39. Provision and manage storage resources according to Virtual Machine requirements. – Obj 2.2
  40. Configure datastore alarms, including Virtual SAN alarms. – Obj 2.2
  41. Expand (Scale up / Scale Out) Virtual SAN hosts and disk groups. – Obj 2.2
  42. Analyze and resolve storage multi-pathing and failover issues. – Obj 2.3
  43. Troubleshoot storage device connectivity. – Obj 2.3
  44. Analyze and resolve Virtual SAN configuration issues. – Obj 2.3
  45. Troubleshoot iSCSI connectivity issues. – Obj 2.3
  46. Analyze and resolve NFS issues. – Obj 2.3
  47. Troubleshoot RDM issues. – Obj 2.3
  48. Create and manage vSS components according to a deployment plan. – Obj 3.1
    1. VMkernel ports on standard switches.
    2. Advanced vSS settings.
  49. Configure TCP/IP stack on a host. – Obj 3.1
  50. Create a custom TCP/IP stack. – Obj 3.1
  51. Configure and analyze vSS settings using command line tools. – Obj 3.1
  52. Deploy a LAG and migrate to LACP. – Obj 3.2
  53. Migrate a vSS network to a hybrid or full vDS solution. – Obj 3.2
  54. Analyze vDS settings using command line tools. – Obj 3.2
  55. Configure Advanced vDS settings (NetFlow, QOS, etc.). – Obj 3.2
  56. Determine which appropriate discovery protocol to use for specific hardware vendors. – Obj 3.2
  57. Configure VLANs/PVLANs according to a deployment plan. – Obj 3.2
  58. Create / Apply traffic marking and filtering rules. – Obj 3.2
  59. Configure appropriate NIC teaming failover type and related physical network settings. – Obj 3.3
  60. Determine and apply failover settings according to a deployment plan. – Obj 3.3
  61. Configure and manage Network I/O Control v3. – Obj 3.3
  62. Determine and configure vDS port binding settings according a deployment plan. – Obj 3.3
  63. Perform a vDS Health Check for teaming, MTU, mismatches, etc. – Obj 3.4
  64. Configure port groups to properly isolate network traffic. – Obj 3.4
  65. Use command line tools to troubleshoot and identify configuration issues. – Obj 3.4
  66. Use command line tools to troubleshoot and identify VLAN configurations. – Obj 3.4
  67. Use DCUI network tool to correct network connectivity issue. – Obj 3.4
  68. Configure a HA cluster to meet resource and availability requirements. – Obj 4.1
  69. Configure custom isolation response settings. – Obj 4.1
  70. Configure VM Component Protection (VMCP). – Obj 4.1
  71. Configure HA redundancy settings: – Obj 4.1
    1. Management network.
    2. Datastore heartbeat.
    3. Network partitions.
  72. Configure HA related alarms and analyze a HA cluster. – Obj 4.1
  73. Configure VMware Fault Tolerance for single and multi-vCPU virtual machines. – Obj 4.1
  74. Configure DPM, including appropriate DPM threshold. – Obj 4.2
  75. Configure / Modify EVC mode on an existing DRS cluster. – Obj 4.2
  76. Create DRS and DPM alarms. – Obj 4.2
  77. Configure applicable power management settings for ESXi hosts. – Obj 4.2
  78. Configure DRS cluster for efficient/optimal load distribution. – Obj 4.2
  79. Properly apply virtual machine automation levels based upon application requirements. – Obj 4.2
  80. Administer DRS / Storage DRS. – Obj 4.2
  81. Create DRS / Storage DRS affinity and anti-affinity rules. – Obj 4.2
  82. Configure advanced DRS / Storage DRS settings. – Obj 4.2
  83. Configure and Manage vMotion / Storage vMotion. – Obj 4.2
  84. Create and manage advanced resource pool configurations. – Obj 4.2
  85. Analyze and resolve DRS/HA faults. – Obj 4.3
  86. Troubleshoot DRS/HA configuration issues. – Obj 4.3
  87. Troubleshoot Virtual SAN/HA interoperability. – Obj 4.3
  88. Resolve vMotion and storage vMotion issues. – Obj 4.3
  89. Troubleshoot VMware Fault Tolerance. – Obj 4.3
  90. Install and configure vSphere PowerCLI. – Obj 5.1
  91. Use basic and advanced PowerCLI Cmdlets to manage a vSphere deployment. – Obj 5.1
  92. Analyze a sample script, then modify the script to perform a given action. – Obj 5.1
  93. Use PowerCLI to configure and administer Auto Deploy (including Image Builder). – Obj 5.1
  94. Create a report from a PowerCLI script. – Obj 5.1
  95. Use Profile Editor to edit and / or disable policies. – Obj 5.2
  96. Create and apply host profiles. – Obj 5.2
  97. Use Host Profiles to deploy vDS. – Obj 5.2
  98. Use Host Profiles to deploy vStorage policies. – Obj 5.2
  99. Import / Export Host Profile. – Obj 5.2
  100. Manage Answer Files. – Obj 5.2
  101. Configure stateful caching and installation for host deployment. – Obj 5.2
  102. Generate vSphere log bundles. – Obj 5.3
  103. Configure and test centralized logging. – Obj 5.3
  104. Analyze log entries to obtain configuration information. – Obj 5.3
  105. Analyze log entries to identify and resolve issues. – Obj 5.3
  106. Configure logging levels for vSphere. – Obj 5.3
  107. Create a Global User. – Obj 5.4
  108. Create a Content Library. – Obj 5.4
  109. Subscribe to a Content Library. – Obj 5.4
  110. Configure a Content Library for space efficiency. – Obj 5.4
  111. Synchronize a subscribed Content Library. – Obj 5.4
  112. Configure esxtop / resxtop custom profiles. – Obj 6.1
  113. Evaluate use cases for and apply esxtop / resxtop Interactive, Batch and Replay modes. – Obj 6.1
  114. Use esxtop / resxtop to collect performance data. – Obj 6.1
  115. Given esxtop / resxtop output, identify relative performance data for capacity planning purposes. – Obj 6.1
  116. Adjust Virtual Machine properties according to a deployment plan: – Obj 6.2
    1. Network configurations.
    2. CPU configurations.
    3. Storage configurations.
  117. Troubleshoot Virtual Machine performance issues based on application workload. – Obj 6.2
  118. Modify Transparent Page Sharing and large memory page settings. – Obj 6.2
  119. Optimize a Virtual Machine for latency sensitive workloads. – Obj 6.2
  120. Configure Flash Read Cache reservations. – Obj 6.2
  121. Configure and manage a vSphere Replication infrastructure: – Obj 7.1
    1. Isolate vSphere Replication network traffic.
    2. Enable data compression of vSphere Replication traffic.
  122. Configure and manage vSphere Replication of virtual machines. – Obj 7.1
  123. Analyze and resolve vSphere Replication issues: – Obj 7.1
    1. Storage configuration.
    2. Multiple point in time snapshots.
    3. Enabling vSphere Replication on VMs.
  124. Create, edit and clone a vSphere Data Protection backup job. – Obj 7.2
  125. Modify a preconfigured backup job. – Obj 7.2
  126. Backup and restore a Virtual Machine (file level restore, full VM backup). – Obj 7.2
  127. Create a replication job according to a deployment plan. – Obj 7.2
  128. Configure a Backup Verification job to ensure integrity of restore points. – Obj 7.2
  129. Backup and restore distributed switch configurations. – Obj 7.3
  130. Backup and restore resource pool configurations. – Obj 7.3
  131. Export Virtual Machines to OVA/OVF format. – Obj 7.3
  132. Use a Host profile to recover an ESXi host configuration. – Obj 7.3
  133. Add/Edit Remove users on an ESXi host. – Obj 8.1
  134. Configure vCenter Roles and Permissions according to a deployment plan. – Obj 8.1
  135. Configure and manage Active Directory integration. – Obj 8.1
  136. Analyze logs for security-related messages. – Obj 8.1
  137. Enable and configure an ESXI Pass Phrase. – Obj 8.1
  138. Disable the Managed Object Browser (MOB) to reduce attack surface. – Obj 8.1
  139. Configure and manage VMware Certificate Authority. – Obj 8.2
  140. Configure and manage VMware Endpoint Certificate Store. – Obj 8.2
  141. Enable / Disable certificate checking. – Obj 8.2
  142. Generate ESXi host certificates. – Obj 8.2
  143. Replace default certificate with CA-signed certificate. – Obj 8.2
  144. Configure SSL timeouts according to a deployment plan. – Obj 8.2
  145. Enable and configure ESXi Lockdown mode (Strict / Normal). – Obj 8.3
  146. Configure a user on the Lockdown Mode Exception Users list. – Obj 8.3
  147. Customize SSH settings for increased security.  – Obj 8.3
  148. Enable strong passwords and configure password policies. – Obj 8.3
  149. Configure vSphere hardening of virtual machines according to a deployment plan. – Obj 8.4


Repointing an Embedded VCSA 6.0 to an External PSC (with a wrinkle)

So, I am studying for the VCAP6 DCV Deploy exam (which is currently scheduled for a week from now) and I am testing repointing an embedded VCSA to an external PSC in my lab. I have deployed a vCenter Server Appliance 6.0 using PowerCLI and the full_conf.json script provided on the ISO. Then I deployed a VCSA PSC using a script too.

Then I went to repoint the VCSA to the PSC. I opened an SSH session to the VCSA.

I ran the following commands.

Command> shell.set –enabled True

Command> shell

Test-VC07:~ # cmsso-util reconfigure –repoint-psc test-psc01.lab.local –username administrator –domain-name lab-vsphere.local –passwd Password123!

And then I received the following message:

cmssoerror1

I Googled the error and found a few KBs and community posts indicating the issue might lie with the case-sensitive nature of the command. Perhaps DNS had my PSC name IN ALL CAPS! So I looked, and as I suspected, the DNS entry was all in lower-case. So, I verified the PNID of the PSC appliance. I SSH’d to the PSC, and ran the following command and received the output:

test-psc01:~ # /usr/lib/vmware-vmafd/bin/vmafd-cli get-pnid –server-name localhost

test-psc01.lab.local

So the issue wasn’t with case-sensitivity. Some further Googling suggested setting up replication between the VCSA and the PSC using vdcrepadmin. So, I went back to my SSH session with the VCSA and ran the following command:

Test-VC07:~ # /usr/lib/vmware-vmdir/bin/vdcrepadmin -f createagreement -2 -h test-vc07.lab.local -u administrator -w Password123! -H test-psc01.lab.local

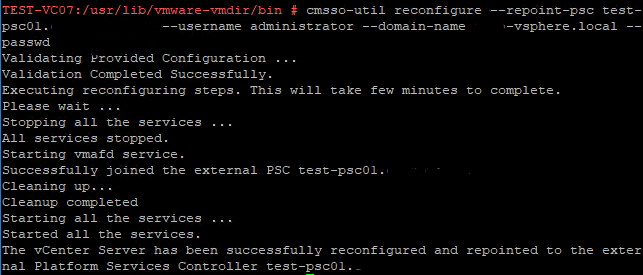
Then I tried re-running the cmsso-util command on my VCSA. And it worked!

cmssoerror2.PNG

The only thing I can determine is that perhaps, even though I deployed both VCSA nodes to the same SSO domain and the same site, perhaps there was some interference on the network side. Either way, I got it working.

On logging into the VCSA now, I receive the following message:

cmssoerror3


So, if you encounter the same issue I did, perhaps this will help you get around it.

vWebster